|
|
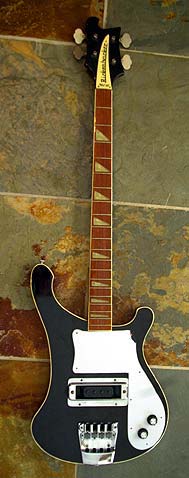
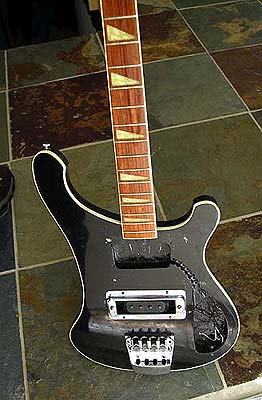
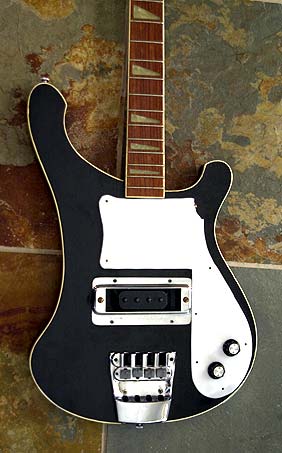
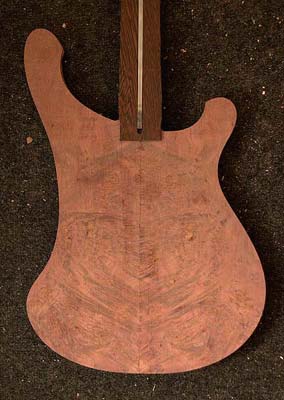
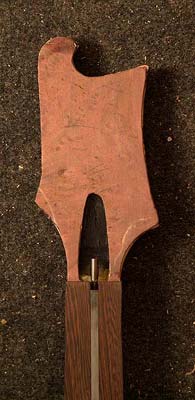
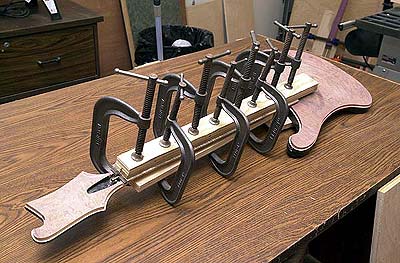
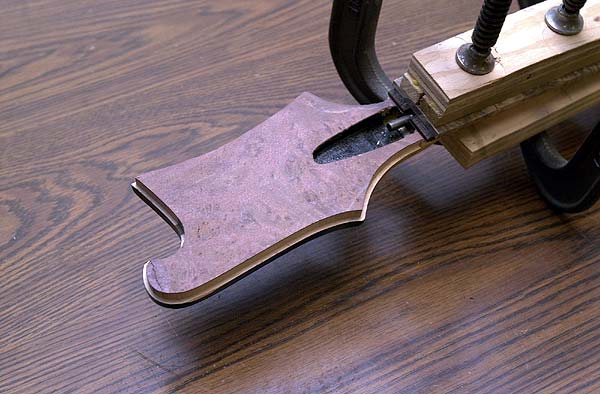
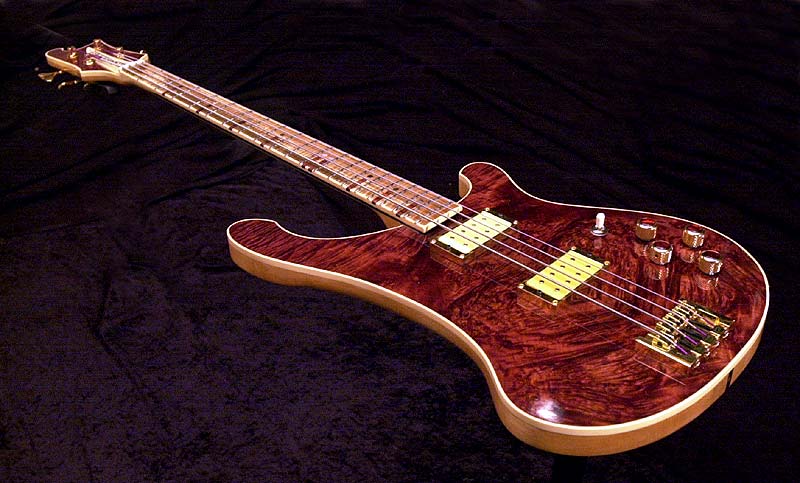
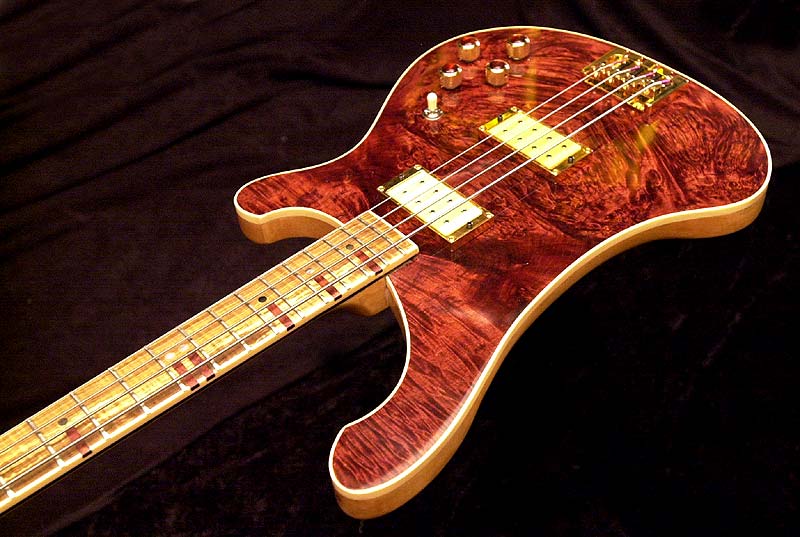
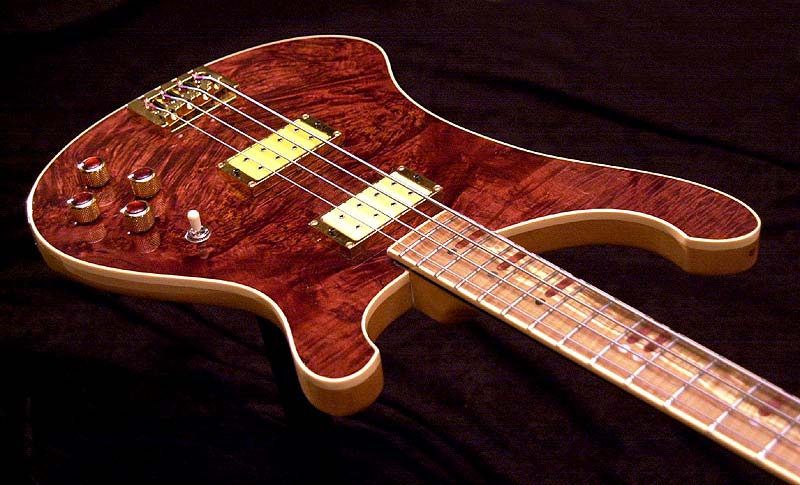
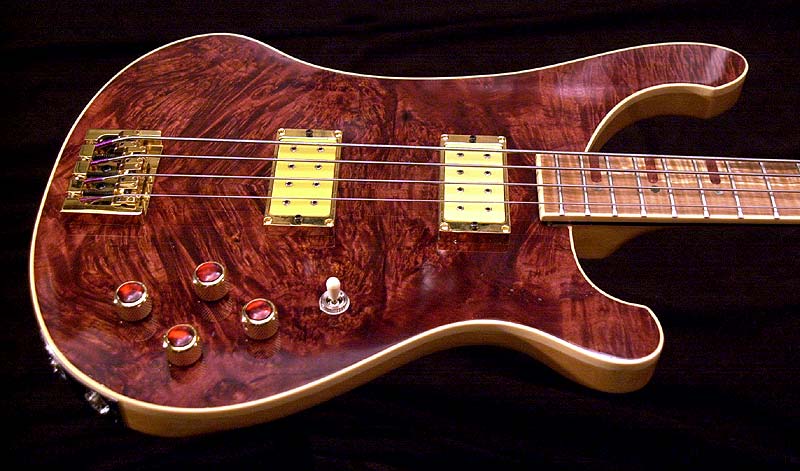
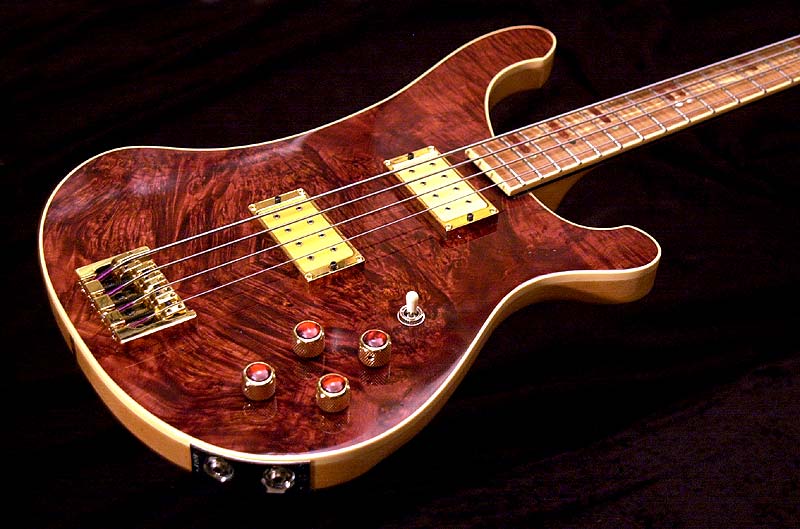
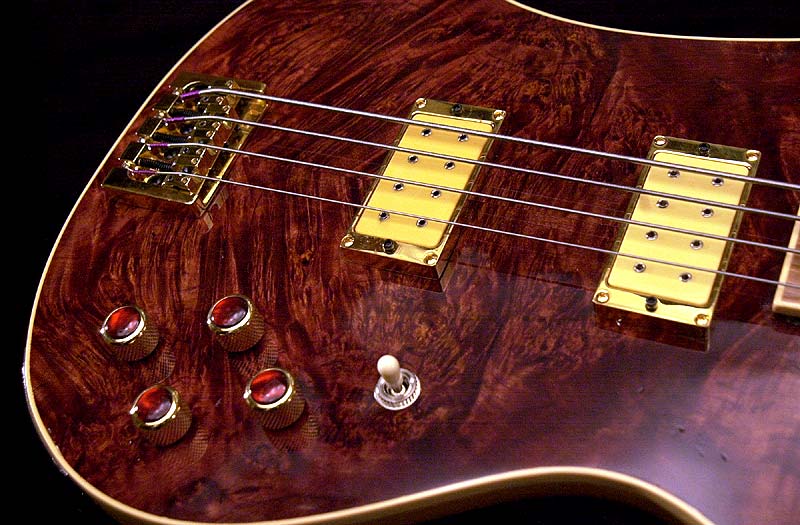
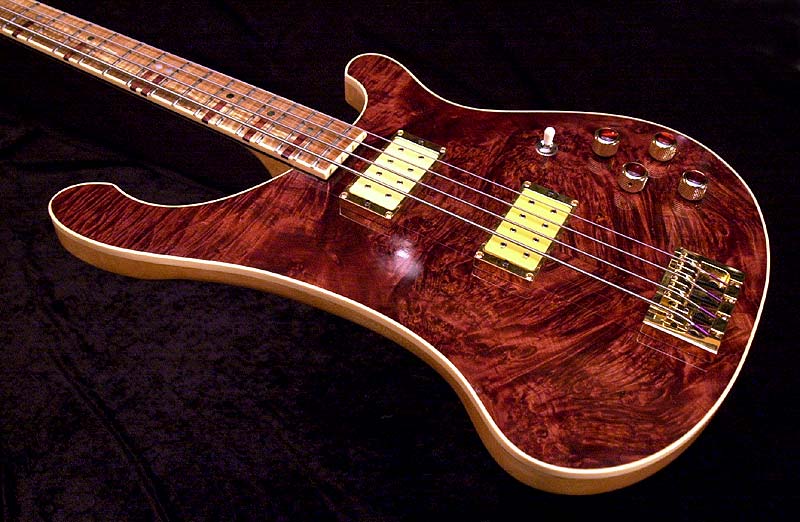
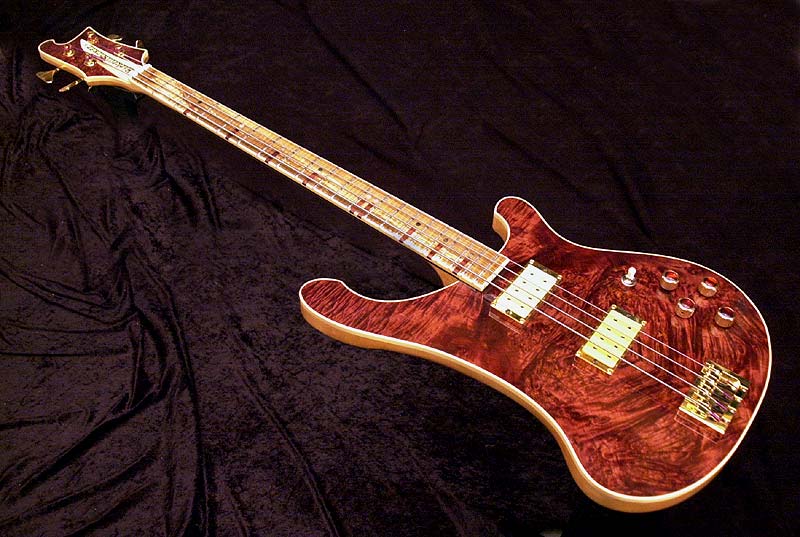
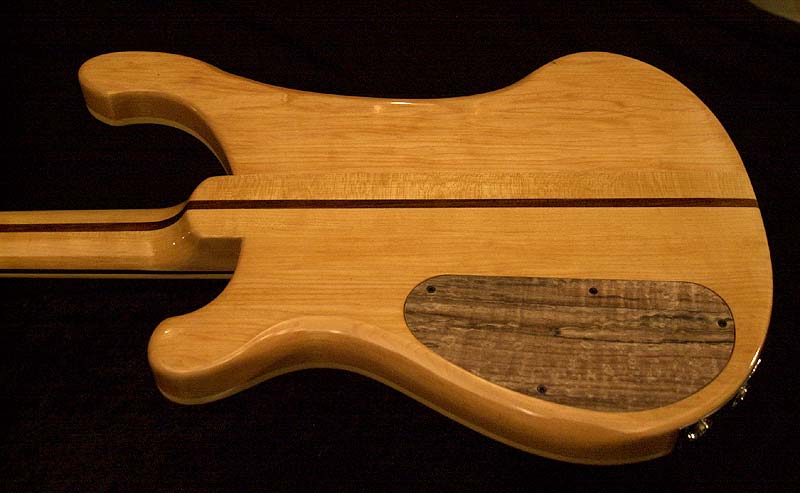
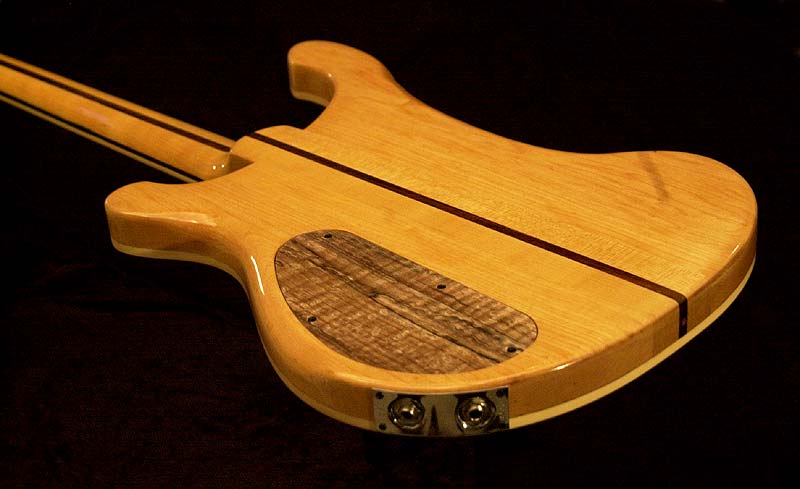
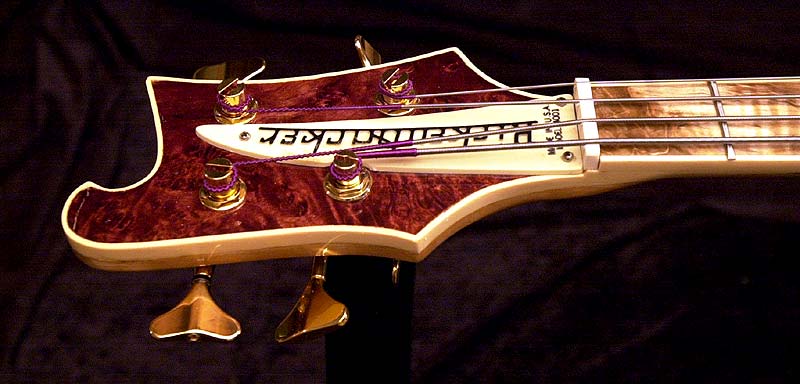
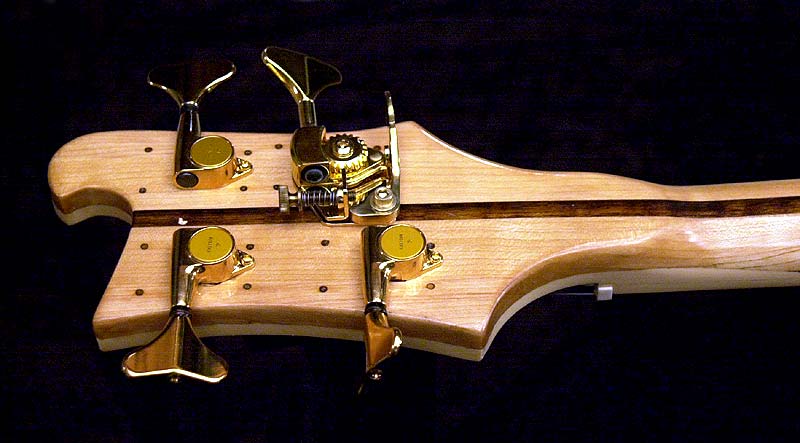
Rickenbacker 4001 Repair / Restoration / Hot RodI had a really nice Ric that was stolen around `91 or so, and I've always wanted to replace it. However, as weird as it may seem, I had been looking for one that was beat up or broken, so that I could restore it and hot rod it as I saw fit. Well, I finally found one that has a pretty bad break in the neck, and has had many "modifications" done to it over the years (parts removed, spray painted, etc....). I got it for a pretty reasonable price and so the restoration begins.What I'm planning is to first repair the neck break (already clamped and glued the day I got it). I decided to remove the original truss rods and fill the truss rod slots with purpleheart stringers and then install a new dual action truss rod. Then a new stabilized flame maple fingerboard with block inlays. I'm then going to take about 3/16" or so off of the top of the body and put on a burgundy / rasberry dyed through maple burl top on it. I'm going to put a DiMarzio bass pickup up under the neck, and a DiMarzio humbucking bass pickup in the bridge position with gold mounting rings for both. Hardware will be either a gold Hipshot Model A bridge or their new individual string through body bridge saddles and gold Hipshot tuners. Once the new maple top is on it, I'll probably but white-black-white ivoroid binding on it and the headstock. Oh yeah, and gold Q-Parts dome knobs with red pearl tops. |
||||||||||||||||||||||||||||||||||||||||||||||||||||||||||||||||||||||||||||||||||||||||||||||||||||||||||||||
|
|
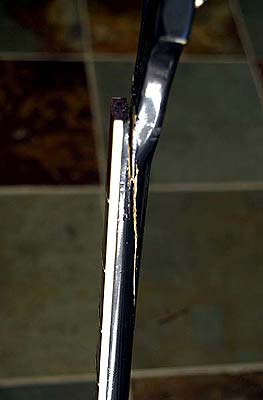
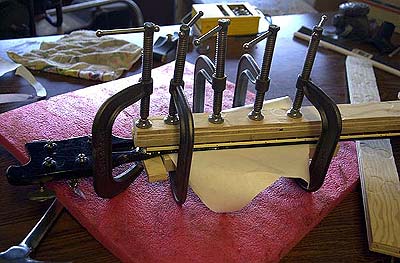
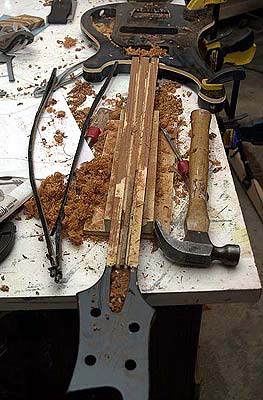
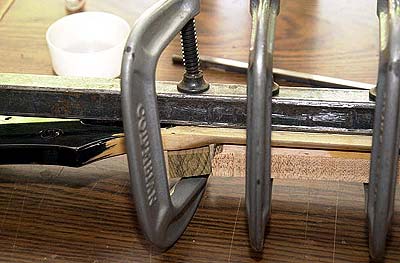
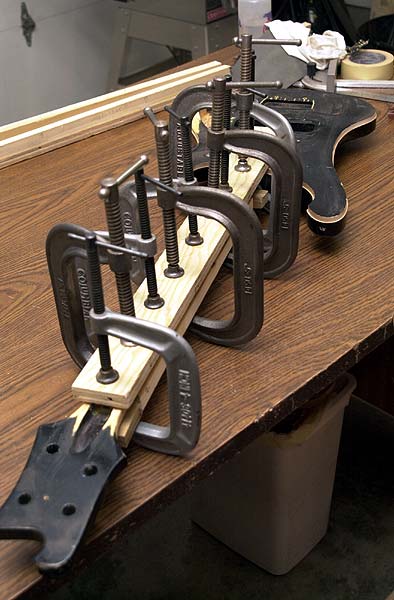
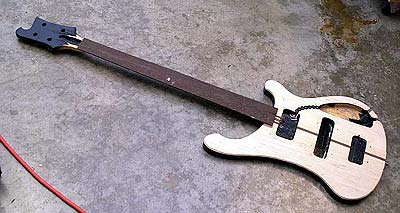
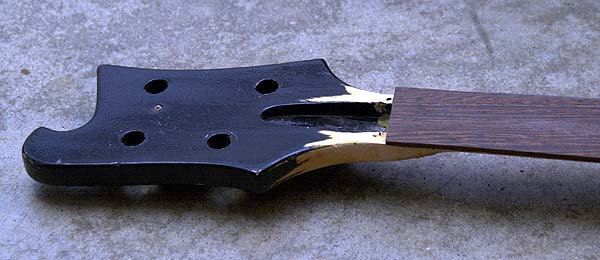
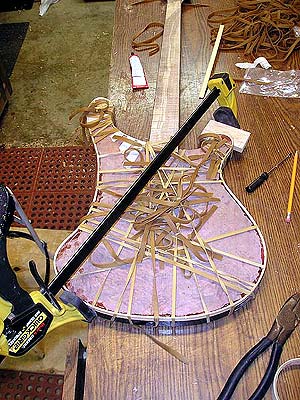
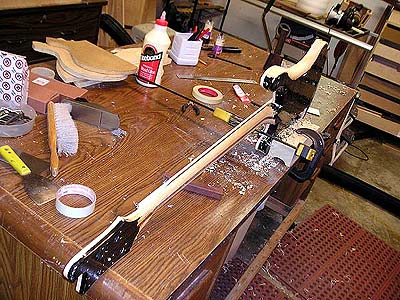
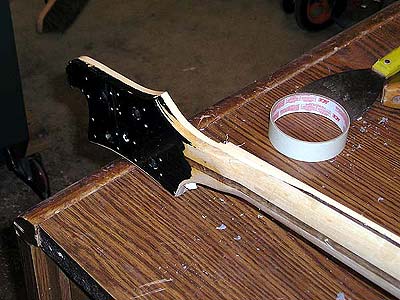
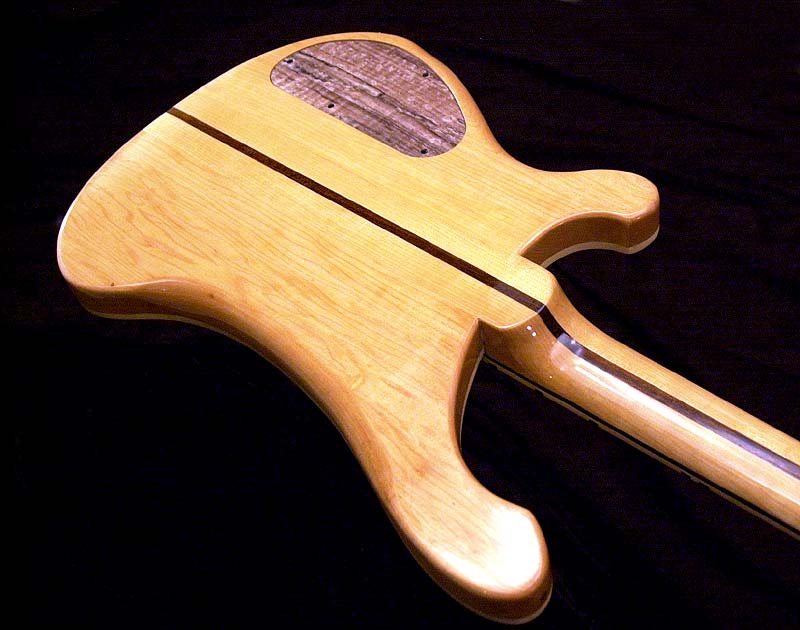
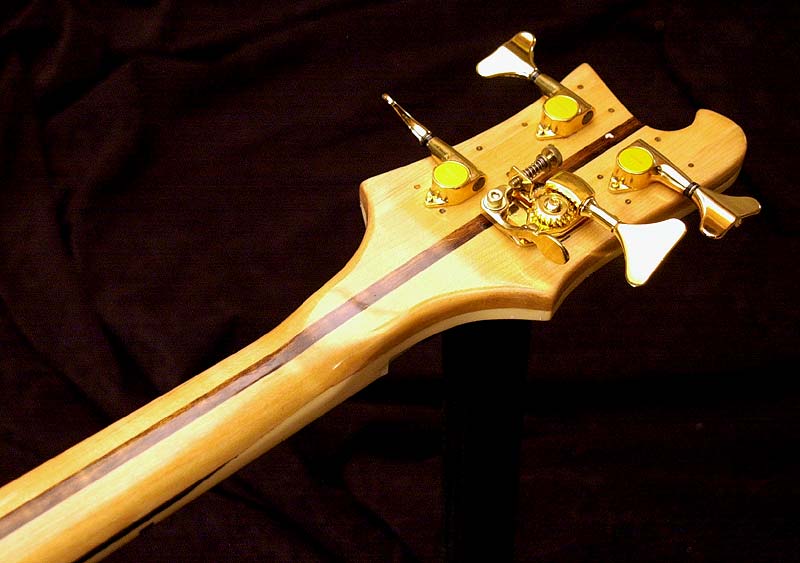
Status and UpdatesHere are some pics of the bass shortly after it arrived. I took it apart, cleaned out the crack in the neck, and glued and clamped it up.(click on image to view larger version)
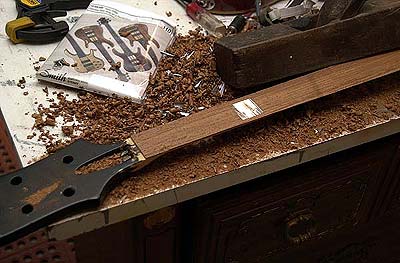
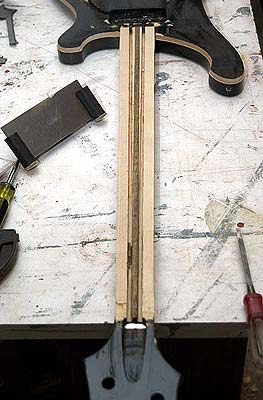
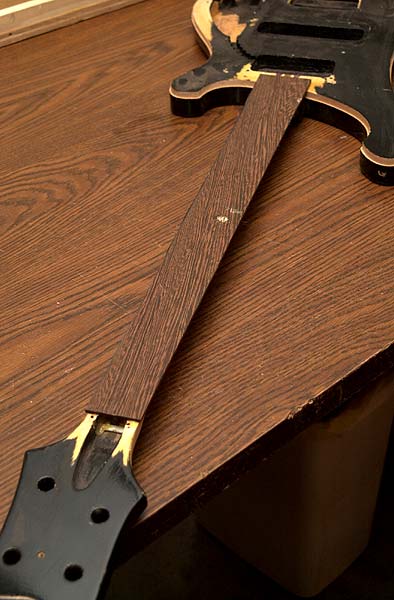
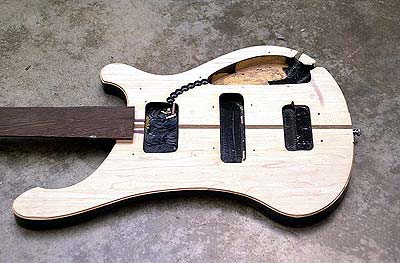
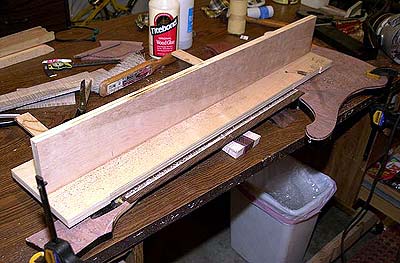
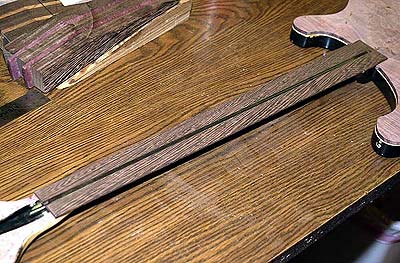
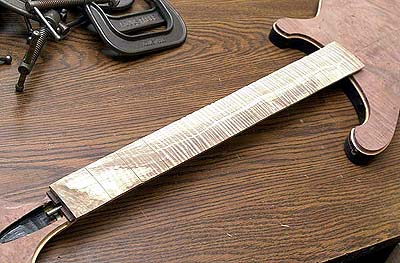
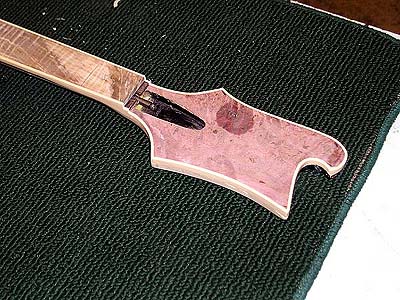
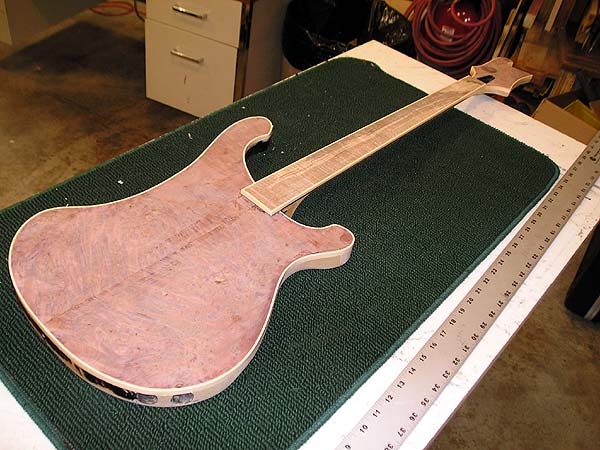
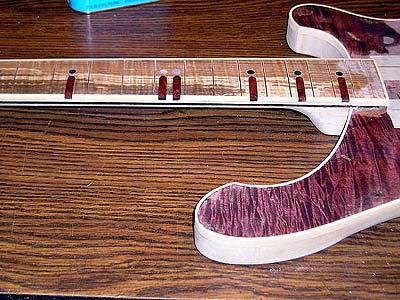
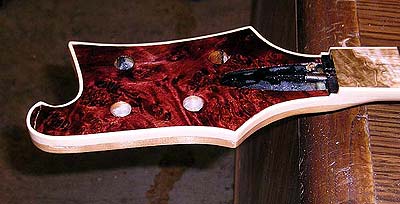
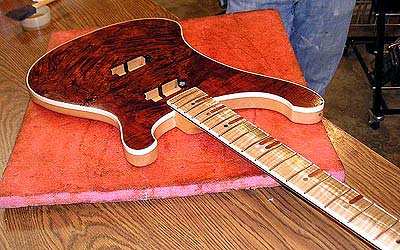
The figured top is on, the original fingerboard and truss rods removed, the wenge layer added to the neck and the new double action truss rod is in. The new stabilzed flame maple fingerboard is slotted and just needs to be radiussed and glued on.
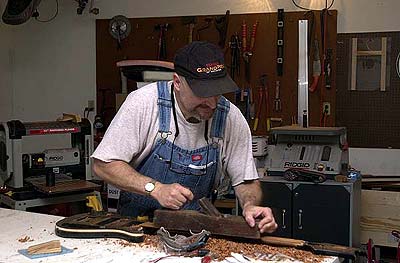
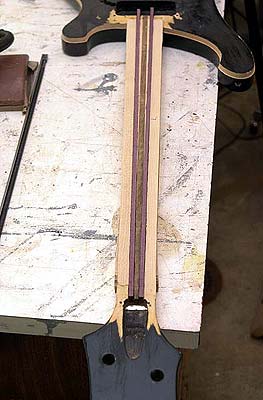
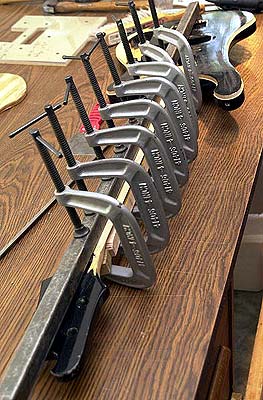
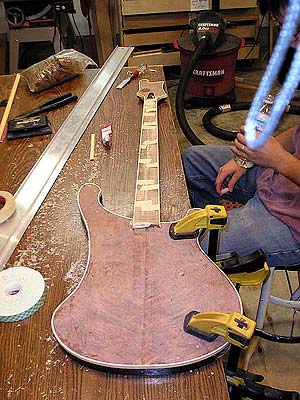
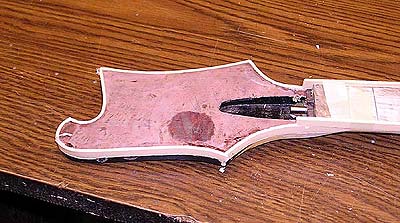
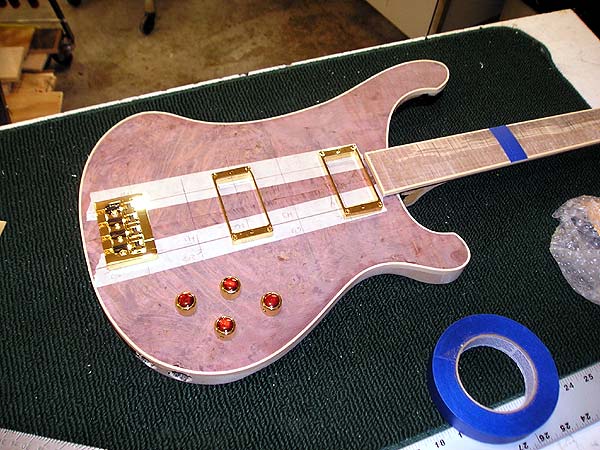
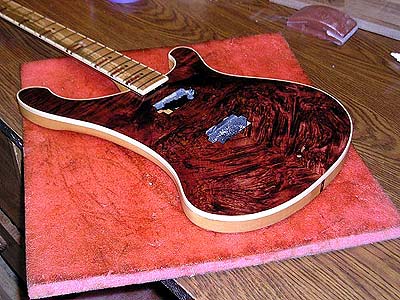
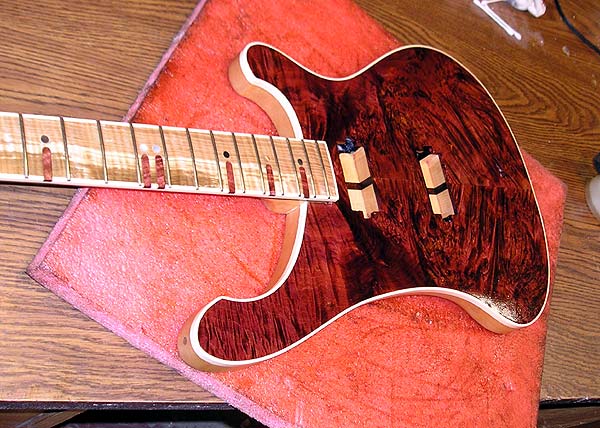
At this point Greg, a local Purdue Student getting his BA in Wood Producst Manufacturing Technology and an extraordinarily talented wood worker, took an interest in the bass and pretty much took over from here. After I had completed all of the repairs, the new truss rod and fingerboard, new figured top, etc., etc., Greg took over and did the binding and inlays, etc. are done. Here are some pics of the bass at this stage, all ready to route new pickup cavities and control cavity cover recess! Then on to final sanding and finishing!
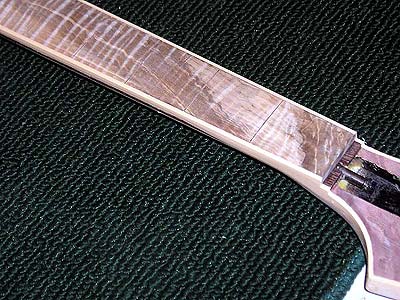
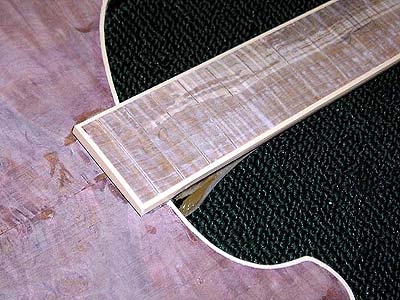
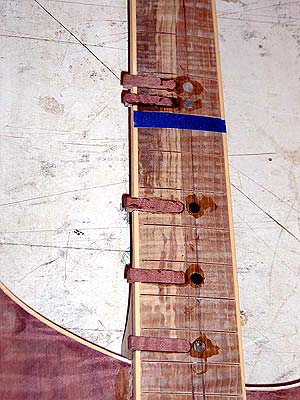
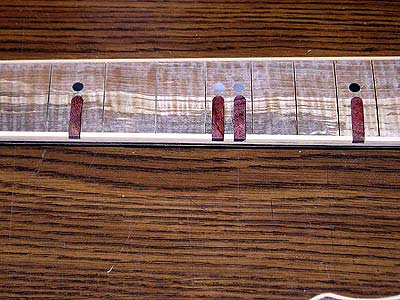
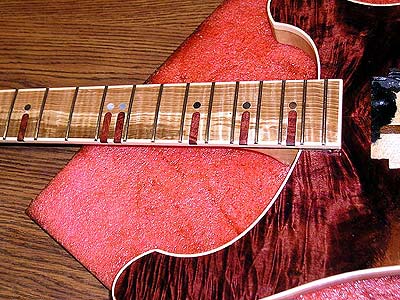
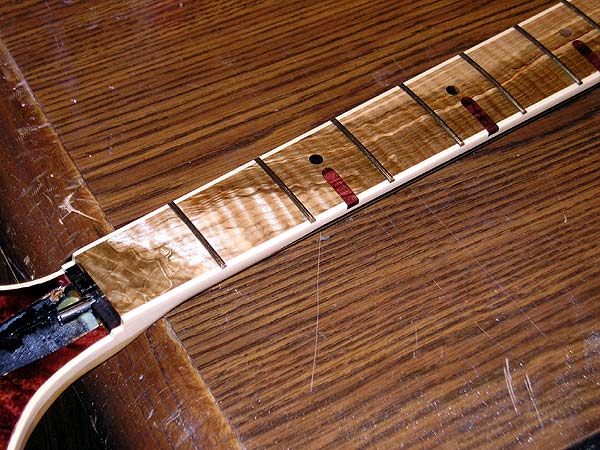
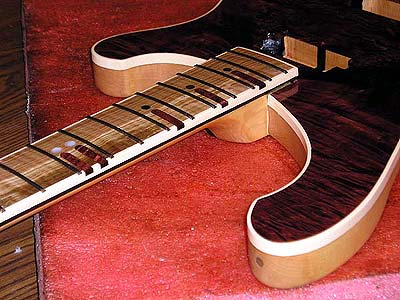
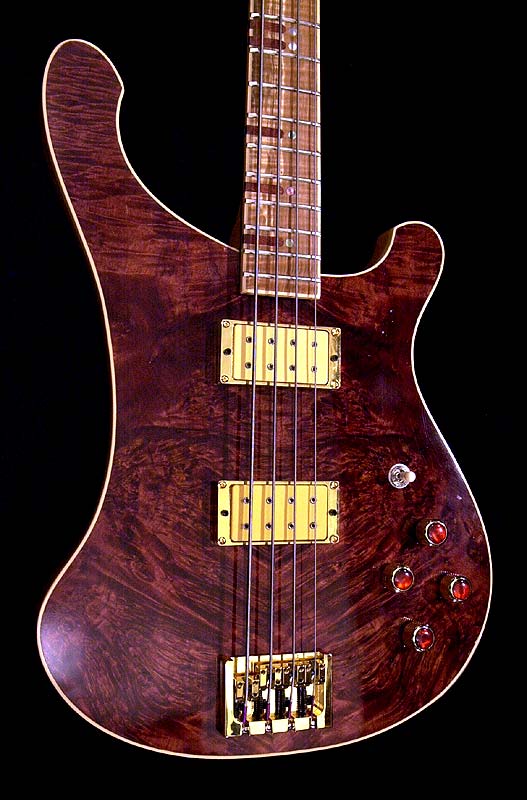
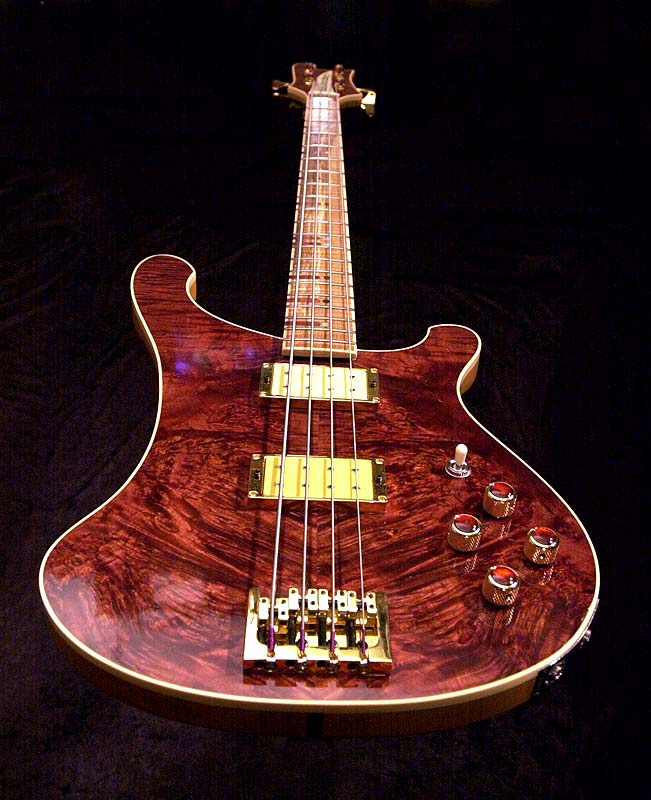
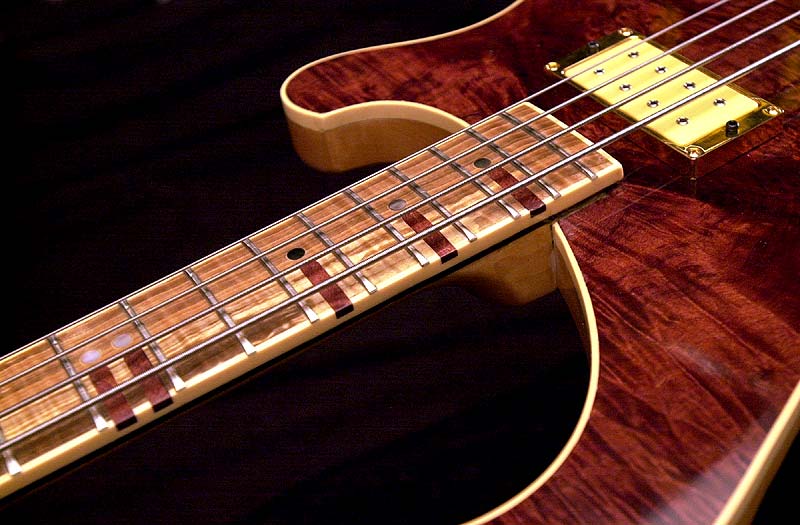
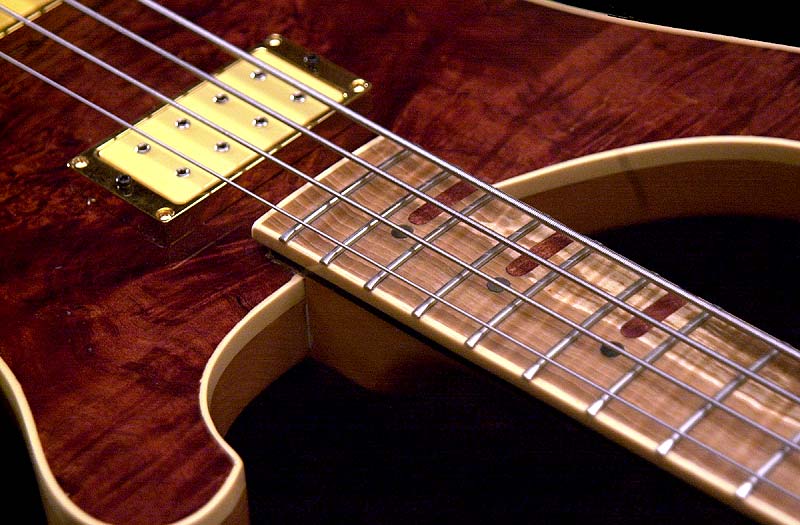
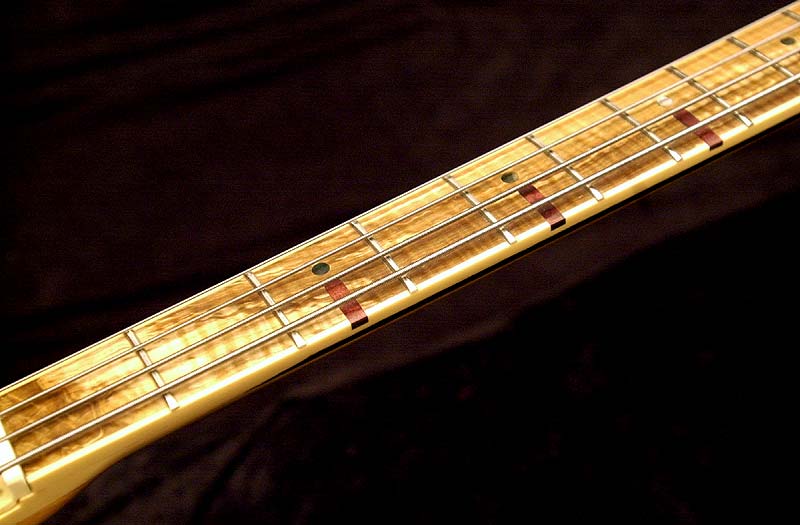
I was originally planning on putting in regular block inlays, but I had a new fingerboard inlay design in my head that I've been meaning to try, and I figured I'd try it out on this bass. I had Greg cut 1/4" wide pieces of rasperry dyed maple burl from left over pieces from the topset, rounded the ends off, then routed 1/4" wide grooves into the fingerboard for each inlay to the center of the fingerboard and then glued in the pieces of the 1/4" wide rasperry dyed maple burl in the grooves. The grooves were cut right through the sides of the fingerboard binding and halfway down the thickness of the binding to show out the sides of the binding instead of using standard side dots. Then, at the end of each inlay we placed a 1/4" black mother of pearl dot, and at the 12th fret where we put two maple burl bars with two white mother of pearl dots. Greg did a perfect job on the binding and inalys! I just love the look of these inlays as fingerboard markers, and will be offering this as an option on my basses from now on. So, the inlays are done, fretting is done, starting to put the finish on! Won't be long now!
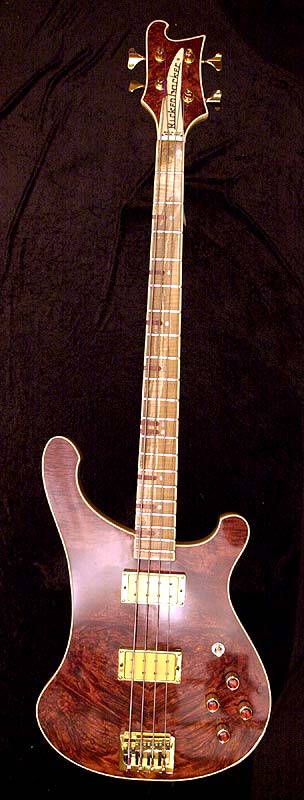
12 October - The "Frankenbacker" came back from the finish shop today after receiving several coats of nitrocellulose lacquer, and I immediately built it up! All that is left that is still from the Rickenbacker factory from 1977 is the wood of the body and neck, the "Rickenbacker" truss rod cover nameplate, and the dual "Ric-O-Sound" metal output jack / serial number plate. I'll let the pics speak for themselves!
|